Physical vapor deposition of thin films is the vacuum-based creation of engineered coatings a few micrometers thick on metal or polymer parts. These films deliver high hardness, low friction, and chemical stability. For Woodbridge manufacturers, PVD thin films extend tool life and stabilize quality when throughput and uptime matter most.
By Ron · Sputtek
Last updated: June 25, 2026
Hero Section
Sputtek delivers high-performance PVD thin films and DLC coatings from our engineering-led facility near Woodbridge. We help automotive, aerospace, medical, energy, and packaging teams boost wear resistance, cut friction, and stabilize throughput—from prototype trials to reliable, high-volume production.
We’re Canada’s largest PVD/DLC service provider, combining ISO 9001:2015 quality, Nuclear N299.3 vendor approval, and end-to-end in-house prep and QC. Our SPUN-series systems handle large payloads consistently, so your dies, molds, cutters, and precision components keep running longer with tighter process control.
Summary
This page explains how PVD thin films work, when to choose them over alternatives, and how Sputtek executes repeatable, production-grade coating runs in Woodbridge. You’ll see services, step-by-step process, selection criteria, quality safeguards, local considerations, and a practical FAQ for engineers and buyers.
- What you’ll learn: PVD fundamentals, film types, and where they outperform.
- For whom: Manufacturing engineers, toolmakers, QA leads, and sourcing teams.
- Why Sputtek: Certified systems, big-batch capacity, fast local support.
- Outcomes: Longer tool life, steadier Cp/Cpk, and less unscheduled downtime.
Introduction
Physical vapor deposition of thin films forms dense, adherent coatings—often 0.5–5 µm thick—that harden surfaces and reduce sticking. In production, these films help dies resist galling, molds release cleaner, and cutting edges stay sharp longer, improving quality and uptime.
PVD isn’t just a finish; it’s an engineered surface system that changes how tools wear. In our experience with Woodbridge and GTA plants, switching to a tuned PVD stack can stabilize dimension control and reduce scrap during peak demand, especially on abrasive alloys or resin-filled polymers.
- Industries we support: Automotive, aerospace, oil & gas, nuclear, defense, medical devices, pharma, and food & packaging.
- Applications: Stamping dies, plastic injection molds, extrusion tooling, cutting tools, and precision components.
- Complementary tech: DLC for ultra-low friction, Thermospray/Pulsed HVOF for rebuilds and heavy-duty wear zones.
Services Offered
We provide production-grade PVD and DLC coatings, Thermospray/Pulsed HVOF rebuilds, and end-to-end surface prep/post-processing. From prototype tuning to large-batch runs, our in-house lab and SPUN-series systems deliver consistent adhesion, thickness, and finish for demanding parts.
Production PVD and DLC coatings
- Thin film stacks: TiN, TiCN, CrN, AlTiN, AlCrN, DLC variants—selected by temperature, substrate, and duty cycle.
- Typical thickness: 0.5–5 µm for dies, molds, and cutting tools to balance edge retention and tolerance.
- Measured outcomes: Lower friction (DLC often ~0.1–0.2), higher hardness (TiN commonly ~2000–2500 HV), better wear patterns.
- Where used: Stamping and forming, plastic injection, extrusion, machining, valves/seals, and precision mechanisms.
Thermospray (including Pulsed HVOF)
- Purpose: Dimensional restoration and heavy-duty wear protection where thicker overlays beat thin films.
- Pairing strategy: Rebuild with Thermospray, then finish with a low-friction PVD topcoat for hybrid performance.
In-house preparation and QC
- Capabilities: Sandblasting, microblasting, degreasing, stripping, polishing, after-coating lapping, and lab metrology.
- Quality controls: Adhesion checks, thickness mapping, roughness and gloss targets, visual/audit trails per ISO 9001:2015.
For deeper background on low-friction carbon films, see our internal primer on DLC coating process. And if you’re evaluating finishing options for die life and part cosmetics, our PVD finishing guide connects to our broader Deposition cluster.
The Process
Our production method standardizes tool prep, fixturing, vacuum conditions, plasma, and cooldown to lock in adhesion and uniform thickness. Each run is documented under ISO 9001:2015, with checkpoints that align coating chemistry to your duty cycle and substrate metallurgy.
- Assessment: Review drawings, substrates, and duty (temperature, pressure, lubricants, media).
- Preparation: Degrease, blast, mask critical fits; polish or lap to target Ra for release/edge retention.
- Fixturing: Orient parts for line-of-sight coverage; balance mass for thermal uniformity.
- Vacuum ramp: Evacuate chamber; heat soak to stabilize surfaces.
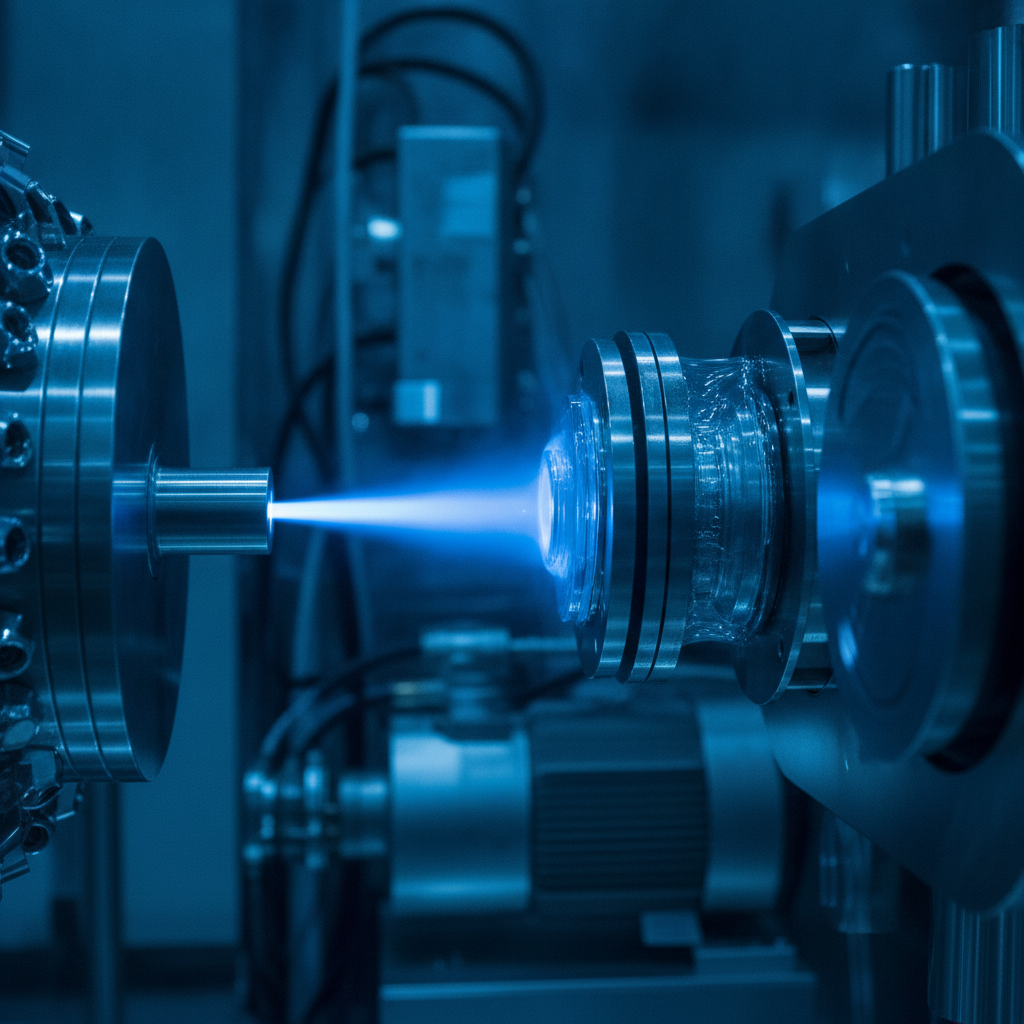
- Plasma clean: Ion etch removes residuals and activates the surface.
- Deposition: Ignite plasma; evaporate/sputter target; grow the thin film to spec thickness.
- Cooldown: Controlled cool to minimize thermal stress.
- Post-process: De-mask, final lap/polish as needed for release or edge finish.
- Verification: Thickness, adhesion, roughness, color/appearance; package with lot traceability.
| Step | Key control | Why it matters |
|---|---|---|
| Surface prep | Cleanliness, Ra target | Adhesion and mold release depend on contaminant-free, tuned roughness. |
| Fixturing | Geometry, thermal mass | Improves thickness uniformity and edge integrity on complex tools. |
| Deposition | Plasma energy, rate | Controls microstructure, hardness, and residual stress of the film. |
| Post-process | Lapping/polish | Sets release and cutting behavior; reduces startup scrap. |
We routinely tune thickness windows for dies and molds between 0.5 and 3 µm to preserve tolerance while extending life. For cutting tools on abrasive alloys, 2–4 µm AlTiN/AlCrN stacks can maintain edges longer during high-duty cycles.
Physical vapor deposition of thin films: What it means for your parts
PVD thin films are line-of-sight coatings grown in vacuum using energetic vapor. They increase surface hardness and reduce friction without changing base metallurgy. The result is cleaner release, less galling, slower wear, and more predictable tool life in daily production.
Why engineers choose PVD
- High hardness: Ceramics like TiN/CrN routinely exceed 2000 HV, resisting abrasive wear.
- Low friction: DLC variants often target ~0.1–0.2, useful for sticking/galling issues.
- Lower thermal risk: PVD runs at temperatures that many hardened steels tolerate.
- Dimensional stability: Micron-level thickness avoids re-machining of critical fits.
When a hybrid approach wins
- Rebuild + finish: Use Thermospray/Pulsed HVOF to restore size, then PVD/DLC to lower friction.
- Multi-layer stacks: Adhesion/base layers + hard ceramic + lubricious top for complex duty.
Not all “coatings” are equal. Consumer finishes like cabinet paint or car-detailing sealants focus on appearance, not engineered wear. For example, a local cabinet painting service or car detailing provider treats surfaces very differently than industrial PVD—use the right technology for the job.
PVD vs. alternatives (CVD, Thermal Spray)
Choose PVD when you need thin, hard, low-friction films with minimal thermal impact. Pick CVD for conformal coverage at higher temperatures, and Thermal Spray for thick overlays or dimensional restoration. Many programs benefit from pairing these methods.
| Method | Typical build | Thermal exposure | Best for | Notes |
|---|---|---|---|---|
| PVD (thin films) | ~0.5–5 µm | Lower vs CVD | Dies, molds, cutters, precision parts | High hardness, low friction, minimal dimensional shift. |
| CVD | ~5–15 µm | High | Complex coverage, high-temp-capable substrates | More conformal; consider distortion risk on some steels. |
| Thermal Spray/HVOF | 50 µm–2 mm+ | Moderate (substrate-dependent) | Rebuilds, impact wear, corrosion barriers | Ideal pre-coat for PVD top layers on heavy-duty parts. |
If you’re balancing release issues in filled resins, our DLC process guide outlines low-friction options; for broader film and finish selection, see our PVD finishing guide.
How we select the right film for your duty
We match film chemistry and thickness to your substrate, surface finish, temperature, and contact mechanics. The goal: stable wear patterns and predictable tool life, not just a harder surface.
- Substrate metallurgy: HSS, PM steels, tool steels, carbides, stainless, titanium, and selective polymers.
- Operating envelope: Heat, lubricant or dry running, cyclic loads, media abrasion, cleaning agents.
- Geometry and finish: Line-of-sight coverage, edge preparation, and Ra for release vs. bite.
- Failure mode history: Adhesive wear, abrasive wear, corrosion, or thermal softening drive different stacks.
- Verification plan: We propose metrology checkpoints and pilot-run acceptance targets.
For polymer tooling, remember that glass transition and vitrification phenomena can affect release behavior; a vitrification study illustrates why matching coating and processing temperature windows matters.
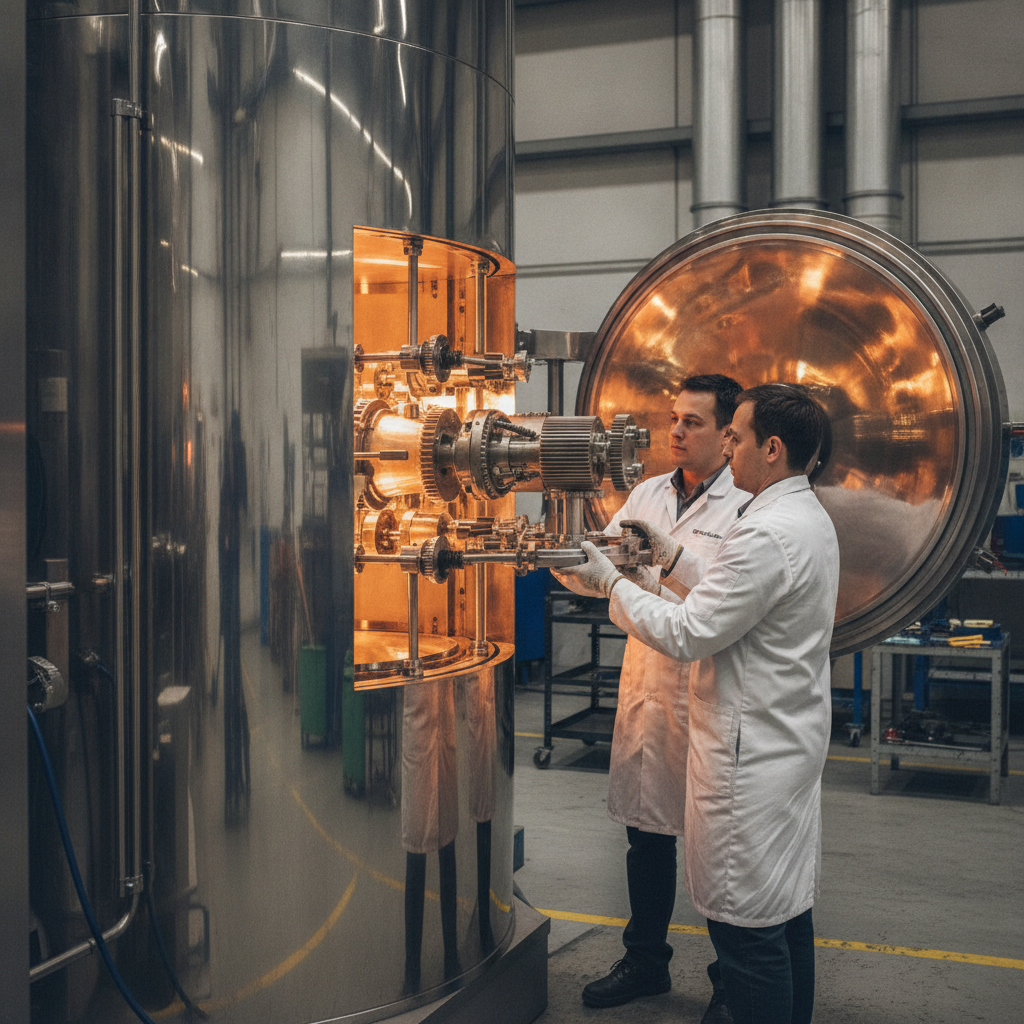
Capacity and systems (SPUN 2,000 and SPUN 4,000)
Our SPUN-series PVD systems combine high payload capacity with stable plasma control for production reliability. SPUN 2,000 supports up to roughly 1,200 kg per cycle; SPUN 4,000 scales to about 3,000 kg per cycle for large-batch repeatability.
- Prototype-to-production: Start with single-cavity tools or pilot cutters; scale to full set coverage without changing chemistry.
- Batch stability: Uniform temperature and plasma density protect consistency across racks and fixtures.
- Traceability: Lot records tie your part numbers to run parameters and QC results.
Pricing considerations (no surprises)
We scope PVD programs by substrate and geometry, film chemistry and thickness, surface prep, and batch logistics. The right specification prevents rework and stabilizes total cost of ownership by reducing tool changeovers and startup scrap.
- Specification clarity: Drawings, material callouts, and known failure modes shorten development.
- Prep and masking: Complex masking or post-lap targets influence routing.
- Batch planning: Fixturing density and repeat part families speed turnarounds.
- Verification: Adhesion, thickness, and finish acceptance reduce back-and-forth.
If you’re unsure whether to specify a lubricious top layer or push hardness higher, our team will model likely failure modes and recommend a path that protects uptime rather than headline numbers.
Why choose Sputtek
We unite certified quality systems with big-batch capacity and hands-on engineering support. That combination lets Woodbridge manufacturers move from trial to volume with less risk, tighter control, and faster problem resolution.
- Largest in Canada: National PVD/DLC scale with responsive local support.
- Certified vendor: ISO 9001:2015 and Nuclear N299.3 approvals.
- End-to-end in-house: Sand/microblasting, cleaning, stripping, polishing, lapping, and QC lab.
- Engineering-led: In-house R&D and process innovation for continuous improvement.
- Capacity: SPUN 2,000 (~1,200 kg/cycle) and SPUN 4,000 (~3,000 kg/cycle) for reliable volume.
We design selection experiments that focus on your highest-risk failure modes, then validate with metrology. That’s how we protect your throughput when you scale.
Service Area
We serve manufacturers and engineering teams in Woodbridge and the surrounding GTA with local pickup coordination, quick technical visits, and responsive support. Our goal is to make coating logistics as smooth as your production schedule.
- Who we support: Tool and die, injection molding, extrusion, machining, and precision component teams.
- How we engage: On-site wear audits, film selection workshops, and pilot-to-production ramps.
- Turnarounds: Batch planning and fixturing templates reduce changeover time between part families.
Local considerations for Woodbridge
- Plan pickups and deliveries to avoid peak traffic near Weston Rd / Highway 7, especially during shift changes.
- Seasonal humidity swings can affect some surface prep steps; we compensate with controlled conditioning in our workflow.
- If your plant is near SmartCentres Woodbridge, coordinate morning dock times for faster turnarounds.
Testimonials
Manufacturing teams choose us for measurable, repeatable gains: steadier release, longer intervals between changeovers, and fewer emergency stoppages. Here’s what local engineers emphasize after switching to tuned PVD stacks.
- “Startup scrap dropped after we adjusted thickness and post-lap—release stabilized on filled resin molds.”
- “Edge life improved across the set; we extended tool changes without chasing tolerance.”
- “Lot documentation and quick local support gave our QA team confidence during ramp-up.”
FAQ
Engineers and buyers often ask about film thickness targets, when to choose DLC vs. hard ceramics, and how PVD compares to spray or CVD. These concise answers help you decide what to trial first.
What thickness should I specify for dies and molds?
Most dies and molds run well at 0.5–3 µm. Thinner helps preserve tight fits and release; thicker can extend life on abrasive media. We’ll recommend a band based on substrate, finish, and duty cycle.
When is DLC better than TiN or CrN?
Choose DLC when friction drives failures—sticking, galling, or need for cleaner release on polymers or sliding components. Pick TiN/CrN/AlTiN when abrasive wear and hot hardness dominate. Many programs use a hybrid stack.
Can PVD go on stainless steel or titanium?
Yes, with the right adhesion and base layers. We routinely coat stainless and titanium components; selection depends on operating temperature, finish, and whether corrosion or wear is the main concern.
How does PVD compare to repainting or consumer ceramic sealants?
They’re not comparable. Paints and consumer sealants are for aesthetics and short-term protection. Industrial PVD creates micrometer-thick, hard, low-friction films engineered for production wear and release stability.
Do you provide trial runs before full production?
Yes. We often start with a pilot on known problem tools, verify adhesion/thickness/finish, then scale across the set using the same chemistry and fixturing approach for consistent results.
Final CTA
Ready to stabilize tool life and part quality with PVD thin films? Let’s verify the right stack on a pilot run, then scale with confidence for Woodbridge production schedules.
Next step: Share your drawings, duty cycle, and recent failure modes. We’ll propose a film and verification plan you can trial quickly.
Explore our internal resources on DLC coatings and the broader PVD finishing guide, then contact us to align specs to your line.
Soft CTA: Need a quick assessment? We can review a problem die or mold, recommend a thin film, and outline a pilot validation checklist. Local teams in Woodbridge get fast support.
Key Takeaways
PVD thin films harden surfaces and cut friction without altering base metallurgy. For Woodbridge production, that means steadier release, longer intervals between tool changes, and fewer emergency stoppages—validated with metrology and lot traceability.
- PVD/DLC often improves wear and release at 0.5–5 µm thickness.
- Hybrid strategies (Thermospray + PVD) protect both dimension and friction.
- Certified systems and big-batch capacity reduce scaling risk.
- Local support shortens iteration cycles and stabilizes quality faster.


